How to Grow the Best Tomatoes in Oregon, Washington & B.C.
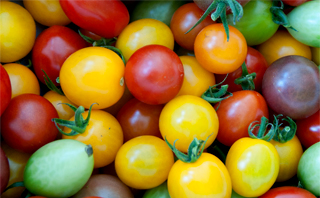
Nothing says ‘We love Summer!’ like the delicious taste of homegrown tomatoes. For many people a garden without tomatoes just isn’t a garden – and there are dozens of varieties suitable for the Pacific Northwest climate. You’ll be amazed at the variety available – from tiny ‘grape’ varieties to green-striped globes to yellow, orange and nearly black fruits.
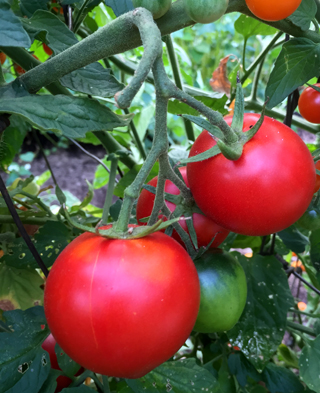
Tomatoes are most vigorous of the solanum family that also includes eggplant and peppers. All originated in South America and prefer warm temperatures and long growing seasons. Thankfully, if you choose the right varieties and provide the right conditions you can still harvest buckets of these delicious fruit here in the Pacific Northwest.
Tomatoes and Your Health
Packed with vitamins and antioxidants tomatoes are especially high in lycopene, a potent phytonutrient associated with a reduced risk of cancer, healthy eyesight and protection against heart attacks. Tomatoes are also an excellent source of vitamins A, B6, C, E & K, biotin, folic acid, niacin, minerals and more.
- Just one medium tomato provides nearly half of the Vitamin C the average adult needs in a day. Vitamin C is a powerful antioxidant and helps to prevent damage caused by the sun and works to smooth wrinkles and improve overall skin texture.
- Tomatoes have even been shown to help lower total cholesterol, LDL cholesterol, and triglycerides.
- According to the American Cancer Society a diet rich in tomatoes may lower the risk of certain types of cancers including prostate, lung, and stomach.
Seasonal To-do List
Early Spring
- Start tomatoes from seed at the end of February through mid-March
Mid-Spring
- Pot tomato seedlings up from starter trays to 4″ pots.
April
- Pot up to gallon size pots. Pot up 4″ plants from a good nursery if you don’t want to start from seed.
May
- Move plants to cold frame or hoop tunnel.
June
- Plant in the ground. Add lime or bone meal.
- Remove low leaves.
- Maintain even soil moisture, keep leaves dry.
July – August
- Eat buckets of yummy fruit!
- Mulch only after soil has warmed
September
- By September 1 stop watering and remove all flowers to promote ripening of fruit
- Cover plants with plastic during rainy periods for a longer harvest
- Harvest unripe fruit and bring inside
- Clean up vines to help prevent diseases next year
Want email reminders including these monthly tasks? Just sign up for our newsletter here.
Growing Tomatoes
Tomatoes are a tropical plant that need all the help they can get to set and ripen fruit before the cool, rainy nights of autumn. Choosing the right variety is your first important decision and also the most fun if you’re growing from seed. Look in any big garden catalog and you will see glowing pictures of giant 3 pound tomatoes. So delicious, so juicy, so tempting – but don’t get sucked in by fancy pictures. The Pacific Northwest just doesn’t have the long, hot summers this kind of fruit requires. Pick a variety with smaller, earlier fruit and you can harvest dozens of ripe tomatoes from every plant instead of waiting and waiting for two or three giants to ripen (maybe).
Tomatoes are also subject to various diseases and pests so genetic resistance is always a good thing – the description will list these. There are hundreds of tomato varieties but we have found the few listed below to be among the most reliable:
Cherry
- Sungold – bright orange globes with a wonderful fruity flavor. Productive and heavenly.
- Sweet Million – delicious and disease resistant red cherries.
Grape
- Sweet Hearts – delicious and disease resistant, grape sized.
Slicing tomatoes
- Stupice – Like an old friend that always shows up when there’s a job to do. Stupice reliably pumps out delicious fruit all season long. We harvest ripe fruits by the end of June.
- Legend – Early and resistant to late blight. Large and sweet.
Tomato Types
- Determinate – sturdy, compact plants need less staking and ripen fruit all at once – good if you’re canning.
- Indeterminate – with a more vining habit they need a taller, stronger support. Ripens high quality fruit over a longer time. See ‘Harvest’ below for easy-peasy preservation tricks.
Starting from seeds
- Why start from seed when you can just but pots at the store?
- Far more choices are available – get just the variety you want.
- It costs less – potted gallon sized plants can go for $5.00 and up each.
- Big box and grocery stores often have marginal plant care – inadequate watering and poor conditions won’t get your plant off to a good start.
- ‘Cause it’s fun that’s why! Choosing seed in January and planting in early March let you indulge in dreams of the summer to come.
- Start seeds in early March or about 8 weeks before your last frost. Use small 2″ pots, or better yet, deep cell-packs with six 2.5″ deep cells. Use a seedling mix or other high quality potting soil – this isn’t the time to skimp on quality. We’ve had good luck with Nature’s, Pro Mix, Dr. Earth and Happy Frog.
- Germination temperature: 70-85 degrees
- Let the surface of the soil dry between watering but don’t allow plants to wilt.
- Cover seeds with 1/4″ soil and lay a piece of clear plastic over the tray until seedlings sprout in 7-10 days – this will keep the soil moist.
- It’s best to water with room temperature water – warm rainwater is even better.
- Once seedlings have two full sets of true leaves pot them up to 4″pots. Water thoroughly two hours before transplanting and place deeper in the new pot – tomatoes will root along any buried stem. Reduce temperatures to 60-70°F
- Handle seedlings by a leaf, not the delicate stem.
- Repot to a one-gallon pot when plants are 8″-10″ tall. Plant deeply and pinch off leaves that will be below the soil level. Keep in a warm, sunny location and fertilize with fish emulsion or water soluble fertilizer like diluted Miracle Grow every 10-14 days.
Impress your friends and grow sturdier tomatoes!
Next time you see a windblown tree at the coast just roll out this impressive word: Thigmomorphogenesis is the change in plant growth resulting from mechanical stimulation like wind or heavy snow. To grow sturdy tomatoes just brush the plants gently whenever you pass by or use a small fan to gently stimulate this response. Of course you’ll also need plenty of light.
Light and Heat
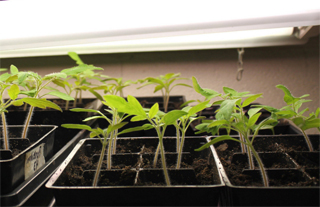
Sorry, but a sunny window sill just doesn’t provide enough light or heat to grow vigorous seedlings. (our motto “All the manure – no BS”) You’ll need some kind of bottom heat plus additional light. Fortunately this is easily accomplished, either with a DIY setup or by buying an all-in-one starter set.
Fancy, high-priced grow lights are not necessary. Cool white fluorescent tubes or compact bulbs can supply all the light needed at a much lower price. Try hanging an inexpensive 4′ shop light by easily adjusted chains then keep it 2″ – 4″ away from your growing plants. (Yup, just 2″-4″ inches.)
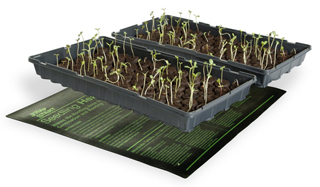
Bottom heat is easily supplied by waterproof mats like the photo below.
Hardening off Seedlings
Tomatoes should never go directly from the cushy, perfect environment of your growing bench directly to the garden without an adjustment period. If you have a cold frame available plants can be moved 3-4 weeks before planting out. Without a cold frame move plants to a sheltered location during the day and bring them back in at night for 10-14 days.
Planting into the Ground
- Plant outdoors when soil temperature reaches 60°F, usually in June.
- To reduce disease wait 3‐4 years before planting any member of the solanum family (tomatoes, eggplants, peppers, and potatoes) again in the same spot.
- Covering your tomato bed with black plastic for a week before planting will warm the soil and help get plants off to a good start.
- Like nearly every other garden plant tomatoes like a sunny location and well-worked soil with plenty of compost and fertilizer. Use a fertilizer like 5-10-10, without too much nitrogen. High nitrogen will lead to vigorous green growth but fewer fruits.
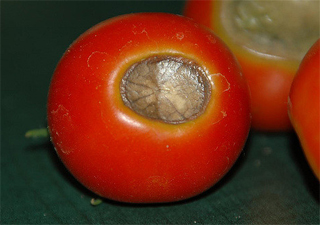
- Add a handful of bone meal to prevent blossom end rot. Lime will also help with this problem but should be added to the soil at least 2-3 months before planting – we find adding lime in the Fall as part of garden cleanup chores is easiest.
- Water pots well an hour or two before transplanting.
- Remove any leaves that will touch the soil and plant deeply.
- To promote early growth and better yields use season extending products such as Wallo’ Waters or red plastic mulch.
Support Your Local Tomato!
In our climate it’s best to support both determinate and indeterminate plants with cages, lattices or stakes. Keeping plants and fruit off the ground is important to help avoid pests and diseases.
Those tapered wire cylinders available at the big box stores may be enough for a small determinate-type tomato but for anything larger you need a more robust cage. We like 18″ cylinders of 4′ field fence but concrete reinforcing wire or livestock panels also work well. Tomatoes can also be trained with two long vertical arms by removing all side shoots. As they grow vines are wrapped around twine tied to an overhead support.
Mulching
Mulch helps to suppress weeds, prevents splashing soil and retains soil moisture. Clear, black or red plastic mulch can be applied before or at the time of planting but wait until the soil has warmed in July to apply organic mulches.
Pests and Diseases
Flea beetles can chew numerous tiny holes in tomato leaves early in the season. They can be controlled with Pyrethrin or avoided with row covers.
Tomato hornworms are rarely seen west of the Cascades but are easily controlled with Bt.
Blossom end rot looks like a disease but is really caused when uneven soil moisture disrupts the supply of calcium to the roots. Add lime, bone meal and keep plants well watered.
The best form of disease control is to select varieties that are disease resistant. Plant descriptions often list disease resistance using these codes:
AB – Early (Alternaria) Blight
F* – Fusarium Wilt
FOR – Fusarium Crown and Root Rot
LB – Late Blight
LM – Leaf Mold
N – Roundworm | Nematode
RK – Root-Knot
TYLCV – Tomato Yellow Leaf Curl Virus
V – Verticillium Wilt
Harvest
During the busy summer season we simply rinse our harvest, let them dry then throw all tomatoes into freezer bags. Frozen tomatoes retain all their vitamins and are great for soups, stews or even smoothies.
As plants decline, usually in September, harvest green tomatoes and store them in a single layer in a cool, dark location to continue ripening.
Happy Gardening!
